My Outside Puppy Runs: Good and Bad Points
Note: Leerburg formerly bred working German Shepherds until deciding to shift its focus towards producing dog training videos and courses alongside providing quality dog training equipment. This article was written while our breeding program was still active. While Leerburg no longer breeds working GSDs, we believe this article may still provide valuable information for those interested in starting their own breeding program.
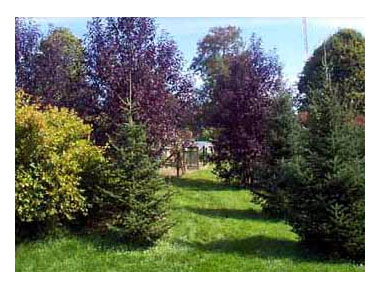
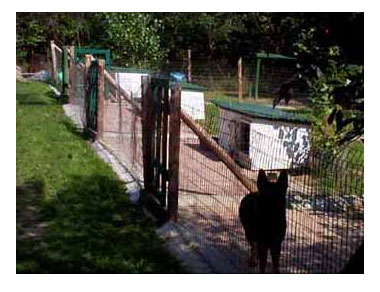
This is a view of the 8 outside puppy yards when you are standing at the back door of the kennel. The point is that you can not see them because of the landscaping. The more you can compartmentalize your facility with landscaping, the quieter its going to be. If you have a bunch of 7-week-old pups and they see you, they are going to scream. When they scream, the other dogs are going to bark. It is all a pain to neighbors. So you are better off to plan ahead and get your trees and shrubs growing ASAP. Fertilizer will become a very good friend.
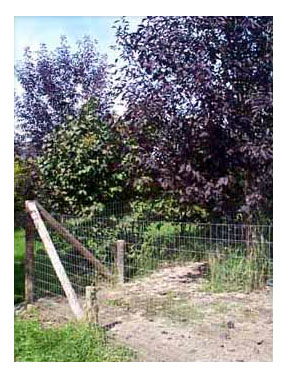
This picture demonstrates one of the biggest errors I made in building my kennel facility. I did not pour concrete puppy runs. I though it would be nicer to keep them on grass. Well this was a very bad idea. As you can see the grass does not grow next to the fence where they run. When it rains the dirt turns to mud. Not only do all pups have worms. Worm eggs live in dirt. So even though we worm pups every Monday from the time they are 2 weeks old they reinfect again - a real pain.
My puppy runs are on the hill behind the kennel building. I would have to let concrete trucks drive through 3 different mature hedges to get concrete back to this area and I am just not sure I want to do this. Another solution if you are build a new kennel is to use 18" "pee gravel" in your runs. It must be that deep though or it will not work. The pee gravel can be hosed and disinfected. Some people feel its easier on the dogs feet. My vote would still be for concrete.
In the summer of 1998, I solved the problem by using patio blocks that were laid on a bed of sand. These blocks were 16" by 18 " and only cost about 40 cents each. The labor was extensive to put them in but we can now hose and disinfect the puppy pens when we need to. It’s a much better solution than before.
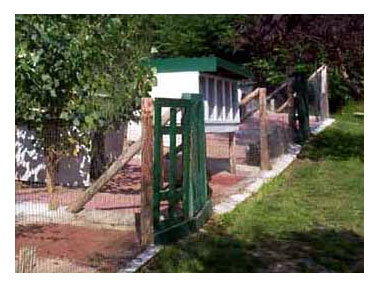
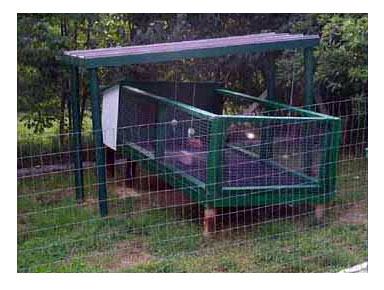
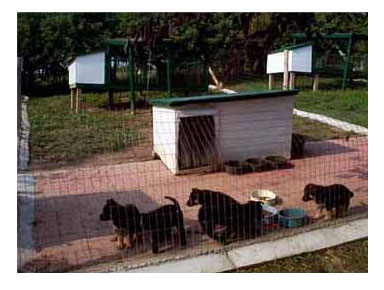
In warm weather, when the pups are about 3 1/2 to 4 weeks old we will start to put them in these outside puppy pens for a few hours a day. The pups will spend 7 to 10 days in these pens before going on the grass in the yards. These raised pens are almost like rabit hutches. The floor is a plastic grate that the waste can fall through, there is shade over part of the 4'X8' run and the hutch is like a small dog house with straw.
These small pens keep the pups clean (even if it rains) and its the beginning of the house training by teaching the pups not to go inside the dog house. The pens are inside the 32x20 puppy yards (which are similar to the larger dog yards). So if we want we can put the mother dog in the yard and her pups in the pens. It gives mom a nice break from the kids, yet she can stay near them and keep an eye on them. Most of the mothers like this.
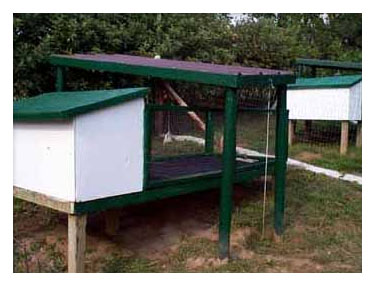
Here is another view of the smaller pens. If we have a pup that we want to keep an eye on for medical reasons we will also put it in it's own hutch. It's a good way for the pup to get extra rest and for us to monitor a higher level of care for the dog in question.
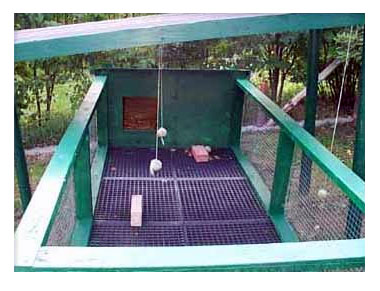
Here is another view of the grates in the puppy pens, we will tie balls to the overhang and keep it stuffed with toys when pups are in them.
This is something new that we added in 1997. I will be building more of them. When the pups get top be 6 1/2 weeks old my kennel staff will put one pup in each of these little boxes for about 30 minutes to 1 hour during cleaning times. This is the beginning of crate training.
There are 2 key things to the construction of these boxes:
- The roof is actually suspended 6" above the actual wire top of the box.
- The floor, front and back are wire.
This ensures that even in direct sun the pups are actually in shade and not over heating. If the roof was actually the top of the box, there would be a risk of the pups overheating.
Here is a different photo of what the puppy pens look like after the patio block has been added.
Kennel Drain Troughs
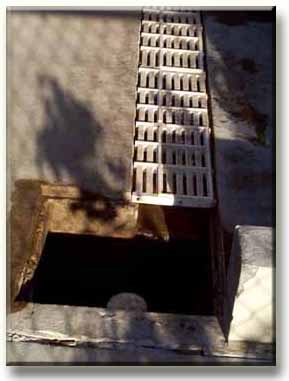
To begin with you want your drains to be outside the dog runs. I have them outside the runs inside the building and in the front of the building. But the contractor made a mistake on the back runs and put them in the dog runs (a real pain to clean). The second mistake was these troughs should have a steep slope so the water runs down the trough into the drain pit quickly. I recommend the slope to be from 1" to 18" over 60 feet.
You can get these white plastic grates that are 1" thick from most companies that supply products to 'pig farmers'. Our troughs are 12" wide, these grates come in 24 "x 24" sizes. We cut them in half and build the concrete forms for them to sit flush with the walk way.
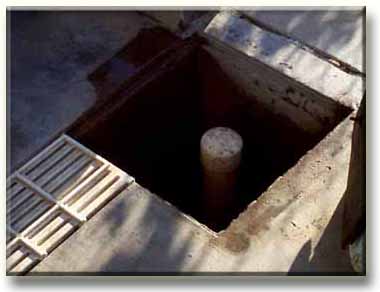
One of the slickest ways I have seen for getting rid of the animal waste (in the summer) is the pits at the end of each trough. These pits are 3 feet deep and 2'x2' square. The pits hold about 30 gallons of water when full. The drain in the bottom of the pit is 4." We keep a 3' stand pipe in the pit (you can see the top of it in the hole). When we clean and hose the runs all the waste and water go into these pits. After cleaning we pull the stand pipe out of the drain hole and the 30 gallons of water flushes all the waste right down the drain. Its like a dog toilet.
In the winter we can not use the pits when it gets below zero because they freeze up. When that happened we are forced to keep the waste in a wheel barrow and empty it on the field next to the kennel when full (the trees in that field love us).
A mistake I made inside the kennel was to not put one of these pits in the whelping room area. No matter how many times you let your bitches outside, some are still going to go on the floor in the night. Without a pit, you will have to carry the dog waste through the building outside. That is a pain in the winter or summer.
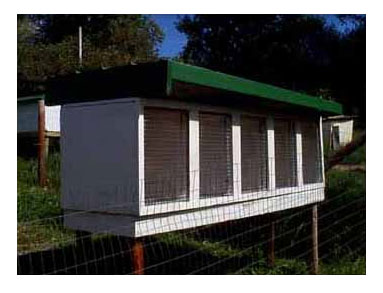
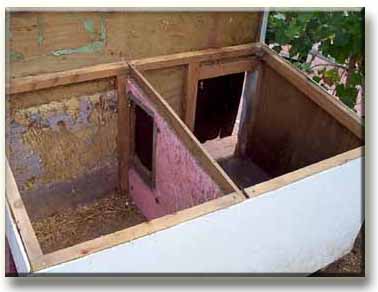
The Best Cold Weather Dog House I Have Seen
The dog house design that I use was borrowed from the RCMP (Royal Canadian Mounted Police) in Canada. Feel free to barrow it from me. This is the best design I have seen for a dog house in a cold climate. It's not uncommon for our dogs to have to stay outside in 30 degrees below zero weather with strong winds. I never feel badly about the dogs because of these houses.
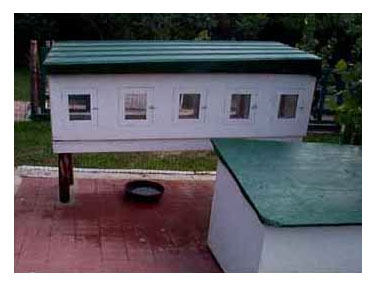
The houses are 3' x 5' - the tops are hinged and lift up for cleaning.
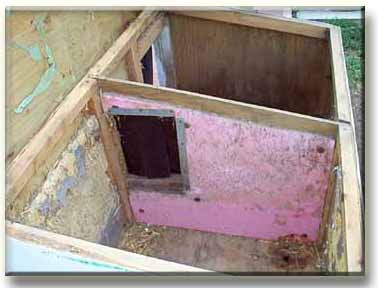
The key to the dog house is the placement of the door into the sleeping chamber. It's near the front of the house and not the rear. Most people make a mistake and put the door to the back of the house. When the wind blows in it goes to the rear wall. If the opening to the sleeping quaters is off the rear wall the wind blows right in. When the opening is near the front the wind will hit the back wall and swirl and die back there. This translates into a lot less wind inside the sleeping quarters.
The most important place for insulation in a dog house is the floor. These houses have an inch of styrofoam under the floor board. In the winter I will put another 1 inch piece under 12 to 18 inches of straw in the sleeping area. I also have styrofoam on the walls in the sleeping area.
I use 2 types of doors. With adult dogs I will use the pick wick 2-way door. It’s sold by Mason Fence. You can find their ads in Dog World Magazine. Be sure and tell them that you want medium springs on the doors so they do not hurt your dog’s tail. The normal spring that comes on the doors will hurt a tail. With puppies and dogs that are visiting I use 6-inch wide rubber flaps. We go to our local farm supply store and buy belts for tractors. These are heavy duty and the dogs cannot chew them.
I also put an aluminum wrap around the sleeping quaters opening. Dogs tend to lay in there and get bored, they will start to chew - the aluminum stops this. In the winter there is fresh straw, in the summer it is all taken out. The only time dogs use the houses in the summer is when it rains. I do not like keeping straw in them during the warm months because it's too easy for bugs to grow in there.
Click here for a table of dog house sizes for various breeds of dogs.


Most Popular Articles
-
01
-
02
-
03
-
04
-
05
Related Products
-
 $20.95 - $25.95


Ask Leerburg.