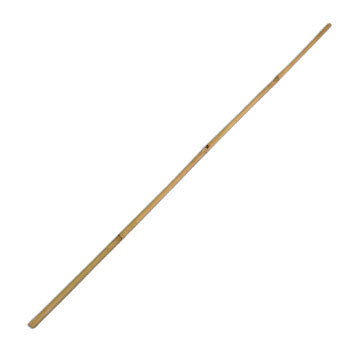
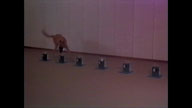
The Stick Attack (Stokstellen)
Ed's Note: The following article was written by a Dutch friend of mine. Bob Neijts has been involved with the KNPV sport for 15 years. I have intentionally not edited any of the article. While the English may not be correct, you will get the flavor of the people who train KNPV from this article.
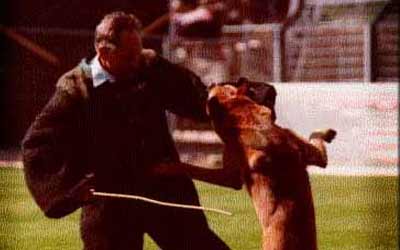
Stopping a man defending himself with a stick.
Before you start training this exercise your dog must understand basic obedience. Also you should have started the first steps of bite work. As soon as your dog understands this it is time to start with the Stick attack.
I will first explain the right way this exercise has to be done:
You have to come to the judge at the start of the exercise with your dog off leash (at least 25 meters.) The judge will explain everything to you and you have a last chance to ask questions. When you are ready to start the exercise the judge will signal the judge at the point where the helper is (app. 100 meters away). The exercise is normally done in the woods in a lane ending in an open field. The judge near the helper gives the helper the signal to come out of the bush. Then the helper appears and he is facing the dog and handler and raises his arm with the stick. At the sign of the judge the handler gives the command "Stop police", he has to repeat this once. His voice has to be so loud that it can be heard by the judge standing next to the helper. At the signal of the judge he will send the dog after the helper. When the dog is about 25 meters away the judge at the start fires a gun. The gunshot may not distract the dog. When the helper hears the gunshot he will make a left or right turn onto the field and out of sight for the dog. When the dog arrives at the field (the handler is running after him) and approaches the helper at about 25 meter, the helper will turn around facing the dog and will hit him with the stick before the dog can get a bite. The helper is not allowed to aim at the legs or head of the dog. The hit preferably has to be given straight over the back of the dog. At the same time the helper will scream and try to chase the dog away. The dog has to bite and stop the helper. The dog may not be afraid of either the hit with the stick or the voice of the helper. The dog is not allowed to try to get the stick! As soon as the handler arrives he has to stop at the judge and on his signal he has to give the dog a command to out. When the dog outs he has to guard the helper. At the signal of the judge the helper starts screaming at the dog and give him commands trying to chase him off. The dog is allowed to bite the helper. If so the judge will give the handler a command to out the dog. Then on a signal of the judge the handler places the dog behind the helper and again at the signal of the judge he starts a transport with the dog guarding the helper. The judge will point out the direction where to go. On the signal of the judge the handler stops the transport and walks up the judge, leaving the dog to guard the helper. Then the handler has to stand behind the judge. At the signal of the judge the helper tries to escape and run away. The dog has to prevent the helper from running away without a command of the helper. On the signal of the judge the handler outs the dog and again at the signal of the judge the handler may pick up his dog. The dog has to heel properly for about 25 meters before the exercise ends.
In my explanation of this exercise I will leave out the part about the transport. The training of the transport is (although it is done together with the rest of this exercise) a chapter of its own. In a separate article I will explain the training of the transport in general and all the different transports in particular. If you train the basics right the rest is easy to add.
Step One
When you know your dog will bite and is able to hold his grip for a short time you have to start to train the dog where to bite. In the KNPV we prefer the upper biceps of the left arm. Always work the dog on a long line. The helper is at this point the only one who moves. The handler stays stationary with the dog app. 1 meter in front of him. The helper will approach the dog and offers his left upper biceps to the dog. He has to turn his underarm to his back and bend over a little bit so the dog can get an easy bite. The handler has to prevent the dog from biting in the leg of the helper! The helper has to turn his head away a little to protect himself from an accidental bite. If necessary the handler can lift the dog to make him bite at the right spot. As soon as the dog bites in the helper has to stand up straight and move his upper body a little to make the dog hang on. The dog has to learn that as soon as he lets go he loses his prey! So when the dog outs without a command the helper has to step back immediately and agitate the dog from a few meters so the dog will try to get a second bite. If the dog is not to tired you can repeat this part.
When the dog has a good bite you have to make him out on command. Don't act too fast, give the dog the pleasure of the bite but act before the dog really gets tired and outs by himself. If you train your dog to out in different situations, like playing with a ball, eating food, etc. and repeat this again and again you will see that this will help you even when your dog really loves to bite. When you have a real hard dog who doesn't want to out on command don't start by pulling the leash like a madman and hitting him but wait until he gets a little tired and gets a weaker grip. You can also pull him up that far that it will be difficult for him to breath and as soon as he gasps for air you have to pull him back away from the helper. Always give him the command to out. So what ever you do always simultaneously give him a command! Don't make the mistake to run at your dog and punish him very hard when he hangs on after you have given him the command to out. If you do this the dog will learn quickly and keep an eye on you and as soon as you move in he will let go and move out of the way. This will do damage to the way he is guarding the helper. Instead keep him on the long line walk up to him slowly and use your voice and if necessary a harder correction to make him out.
After this part of the exercise the helper once again screams at the dog. To built up the confidence of the dog you let him run after the helper and chase him off without giving the dog the chance to bite. This will be the same during the first months of training.
From the start of this exercise the helper has to build up the pressure by screaming and raising the hand with the stick as a threat. It has to start as a sort of game, so in a playful way but as the distance increases the helper has to build up the pressure. The helper has to know exactly what he is doing and always be careful. While still in training the helper does not actually hit the dog with the stick. This part is only done with an advanced dog. Even then not every training session! A clever dog will like a good boxer try to avoid the hit and move out of the way. This happens when you hit him every time you train this exercise. So, don't!
The helper has to threaten the dog with the stick and when the dog bites he has to move his arm like he is hitting the dog but just touch the dogs back very softly. The threat is more important than the actual hit. Later on in training the game gets more intense and rough.
Step Two
From the point where the dog bites in at the right place with a firm grip it is time to increase the distance from where you let your dog attack the helper. You have to make your dog chase the helper for a short distance, holding him back while you hold the line. You encourage the dog with your voice and just a few meters before the helper you let the dog go to enable him to plan his attack and get a good firm bite. Never let go of the line but keep contact with your dog and praise him when he is doing well. Don't go too fast here. Do not increase the distance too much at once because this will make is easier for the dog to make mistakes. The actual attack, like running after the helper, make a good jump, getting a good bite and hanging on is more important at this stage. Every time you train this exercise you will work on all the new aspects along with increasing the distance and making the dog out on command.
Step Three
This is the time to add another aspect to the training. When the dog knows where to bite and when he outs on command it is time to make him guard the helper for a short period of time. In the beginning maybe 30 seconds. Later you can increase the time. You have to spend enough time on this part of the exercise. When a dog sits in front or preferably behind the helper they very often try to get another bite. They jump up to the helper and with the slightest movement of the helper they bite again. Sometimes they keep on biting. Just short, not really hard bites but enough to lose all the points. You have to make clear to the dog that he is only allowed to bite when the helper really screams at him or even better only when he is trying to run away. (This means the dog does not have to bite when the helper gives him verbal commands and tries to chase him off). To keep the dogs attention you can stand next to the helper and tap on his arm or shoulder. Also the helper can make little movements. Be careful otherwise the dog will bite again.
Don't prevent the dog getting a bite by only keeping the leash so short that he is unable to reach for the helper. Keep a tight grip on the leash so you can pull him back if necessary and use verbal commands. Use your voice. Make it clear to the dog that you won't allow it and if necessary correct the dog. Praise and corrections are the most important instruments in dog training. A good way to make your dog stay behind the helper and to be able to give him a correction is by having the helper step over the long line with one foot. When he stands over the line with his legs just a little apart and you stand in front of the helper you can pull the line so tight that the dog is only able to stand or sit right behind the helper.
Actually this step keeps on coming back in every training session. You have to build up the capability of your dog guarding the helper along with the dog learning the other parts of this exercise. At this part of the exercise an assistant trainer is very important. While the dog will focus on you when he gets a bite and when you give him the command to out he can stand on the other side of the helper and the dog and give the dog a correction when necessary. The correction can be given with a long line or maybe with a whip or something. One thing is for sure that he has to know what he is doing. He has to add something to your command and not act by himself.
Step Four
When the dog is able to perform correctly at a distance of about 25 - 30 meters you can start to build up the pressure again. At this point the helper can start to walk into the dog when he attacks instead of almost standing still. If the dog doesn't have a hard attack or to built up his confidence and drive you can make the helper walk backwards. The helper first shouts at the dog and raises the hand with the stick and than runs away from the dog. At about 25 meters he turns around and faces the dog but instead of running towards him he walks backwards. This will give the dog the feeling that the helper is afraid of him and want to attack him even more. He will attack harder and faster and bite with more spirit.
From this point on you slowly increase the distance and make the helper come in harder. Again don't lose focus on the guarding of the helper. Because the distance between the handler and the dog is bigger the dog can get the feeling that he can get an extra bite without being punished for his behavior! So make sure the dog does everything well before you increase the distance. This is the same when the dog doesn't want to out!!!
Step Five
It is time to train your dog to stay at the start until you give him the command to attack. Actually you start this part of the exercise from the beginning but now you have to demand more obedience from your dog. You have to make clear to your dog that even if he sees the helper running away he still has to wait for the command. This requires basic obedience!!
You can start by having the helper appear in front of you and you heel the other way instead of giving him the command to attack. This asks for a lot of training and patience. Repeat it again and again. Keep the dog on the long line and correct him every time he disobeys.
Step Six
Now you have come to the point where the transport comes in. Like I have said, I will explain the training of the transport in an separate article. It is time to put all the pieces of the puzzle together and start to train the exercise in the way it has to be done at the certification trial. I mentioned it more than once. Don't go too fast with this exercise. The better you train all the different parts the better it will be in the long run. Like the start, a good and firm bite, to make your dog out, to guard the helper, etc. will all come back with all the other bite-exercises. So spent enough time and train it right. Let your dog grow and get strong. Don't start this exercise with a dog that is too young. The dog has to be mature to be able to stand the pressure of this exercise.
While writing this exercise I experienced that, although I have trained this exercise hundreds of times, it is very difficult to cut it into different training steps. Different parts of the exercise are trained at the same time but on different levels. I have tried to give the right order of the training steps. You have to know your own dog and know his weaknesses. I have noticed very often that dog handlers don't want to see or hear about the weaknesses of their dogs. Realize that a 100% perfect dog does not exist and work on the weak spots of your dog. Make his good qualities even better and polish the weak aspects until they become acceptable! This will show your qualities as a dog trainer!

Most Popular Articles
-
01
-
02
-
03
-
04
-
05
Related Products
-
$2.50$2.35 -
 $34.99 - $44.99
 -
.jpg)
$131.00$120.52 -
$409.99$369.99


Ask Leerburg.