Sharon here's how I teach the sit. It usually comes after teaching the recall.
+++++++++++++++
Teaching the sit is usually the next step to getting the dog to be “collar literate.” That means that the dog understands that it’s his compliance to a command is what makes the stimulation stop. It means that the dog realizes that he’s in charge of his destiny. HE is the one that controls when the stimulation stops. Once this is learned, great strides can be made in the training.
Tools for the Sit
To teach the sit, which also incorporates the sit-at-a-distance and the stay, you’ll need a few pieces of equipment:
1. A six foot leash,
2. A buckle collar that won’t slip over the dog’s head,
3. Some doggie treats,
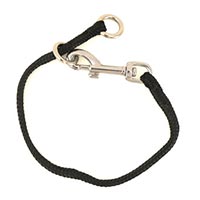
4. A piece of rope about 20' long with a bolt snap on each end and
5. An assistant who is either familiar with dog training or can follow instructions.
Some eye–hand coordination will come in handy but it’s not essential. You can use a correction collar if you don’t have a buckle collar but the leash is going to be used for gentle guidance as before, we don’t want the dog to get a correction.
The Process
Usually the dog will have learned the recall and will be at the “Velcro Dog” stage. This training will put him back into balance and will shatter the superstition that he may have, that there is a safe place at the handler’s side. That superstition has only existed for a day or so, so it won’t be too traumatic to the dog.
At one point during this training you’re going to do four things at once. I recommend that you practice this before you actually go do it so you can get the timing and coordination down perfectly before you start working with the dog. The four things that you’ll do at once are:
1. Say the word “sit.”
2. Press the button on the Ecollar.
3. Move the leash straight up over the dog’s head to pull him gently into a sit.
4. And press gently on his hips to push his butt towards the ground.
One more thing you’ll practice but it happens a moment later. That’s lifting your finger off the button when the dog’s butt hits the ground. It’s important that the dog complete the movement. If you lift your finger off the button too early he’ll think that he’s done right when he’s only squatted down, not for the full sit movement.
Practice the entire movement with the test light or the radio noisemaker on the Ecollar. Most of the units come with a test light, but some don’t, you can make one easily.) If you don’t have a radio noisemaker. Refer to the appendix)
Put the Ecollar on your dog along with the leash and buckle collar and take the dog to your training location. You’re going to use a bit of food to lure him into a sit position from a stand. Give the command “sit” and show the treat to the dog. Then move it slowly back over the top of his head in the direction that his head moves when he sits. It’s back and slightly up. Don’t let him grab the treat out of your hand. If he tries, you can make a fist so that he can’t get to it. When his butt hits the ground give him the treat and praise him verbally. Make sure that he sits straight, rather than on one hip. If he’s a young puppy, he may not be able to do this so take his age and bone structure into account. After doing this four to five times you’re ready to add the Ecollar stimulation to the mix.
I prefer to hold the leash and transmitter in my right hand. I put the leash across my palm and then put the transmitter on top of it, helping to hold the leash there. Walk the dog around a bit and then stop. If he’s had some OB training, out of habit he may try to sit. Just place your hand in his groin area to keep him standing. Don’t give any commands at this point. After a few seconds do the four actions described above all at once. Say the word “sit.” Press the button on the Ecollar. Move the leash straight up over the dog’s head to pull him gently into a sit. And press gently on his hips to push his butt towards the ground. As soon as his butt hits the ground release the button on the transmitter.
Most dogs will settle into a sit. If he pops right back up that’s OK. At this point in the training “sit” doesn’t mean “stay.” Some dogs will freeze up for a moment, resisting the pressure of your hand on their hips. This is completely normal. Think about your dog’s superstition at this moment. He thinks that as long as he’s by you, he’s safe. No stimulation occurs as long as he’s there. But suddenly that changes. A little bit of confusion is normal. Don’t worry; it will fade in a few moments.
If he resists, just keep up the pressure of your hand on his hips. You might move the pressure of the leash from straight up to back a little bit to help him get into the sit position. Whatever you do, don’t release the pressure on the button until he’s in the sit.
Some dogs will try to move away from this spot. They’re recalling the earlier training where, if they moved away from the spot where they were feeling the stimulation it stopped. You prevent the dog from moving forwards or backwards with the leash. He can’t go to the right because you’re in the way. But he can go to the left. If he does let him go. Don’t try to use your hand on his hips to hold him in position; you’ll just make him uncomfortable. Next time you try to guide him into the sit, go stand so that on his immediate left is a wall or a fence of some kind. That way he won’t be able to move away from you.
Some dogs will try to rear up to get away from the stimulation. This is also OK. Gently allow him to come back to the ground but maintain the straight up leash pressure and the pressure on his hips to guide him into the sit.
When he does go into the sit remember to release the button. It’s fine to give him some praise at this moment as well, but not so much that he forgets what he’s doing.
If he stays in the sit, that’s OK too.
If he stays in the sit, give him a release command walk a few feet with him. Then repeat the 4 actions again, guiding him into the sit. If he’s tried to avoid the sit he’ll calm down and soon he’ll be going into the sit without any fuss. Continue to give him the release command, walk him a few steps (mix up the number of steps that you take) and guide him into the sit again.
A few sits after that you’ll discover that as you go to press down on his hips they “fade away” from beneath you. What’s happening is that the dog has come to understand what’s expected of him and is trying to shut off the stimulation a little faster. CONGRATULATIONS! You’ve just stepped into “escape training” which is just about as close to magic as we get in dog training! This is where the dog performs faster and faster in order to make the stimulation stop sooner. The dog is self-motivated to shut off the stimulation.
Next time you tell him to sit you’re not going to guide him either with pressure on his hips or the leash. This time you’re only going to do two things at once, say the word “Sit” and press the button on the Ecollar. Be prepared for him to hesitate. Your body language is a bit different this time. A moment ago you were bending over him and touching him. Now you’re just standing there. If he hesitates, guide him with the leash and pressure on his hips. REMEMBER, if he goes into the sit; release the button as soon as his butt hits the ground. Next time try the same two actions; press the button at the same time that you say, “Sit.” If he hesitates, guide him, this time using only the leash. If he doesn’t go into the sit, then press on his hips to guide him.
After a few of these when you say “Sit” and press the button he’ll go into the sit without the guidance. This is a signal to you that he understands what’s expected of him. Now you want to get ten perfect sits in a row without guidance from you. After each one give him a release command, move him a few feet and give him the sit command again. If he hesitates or otherwise doesn’t go into the sit, guide him with the leash and pressure on his hips until he does. If that occurs, start your count to ten, over again. When you get to ten perfect sits without any guidance praise your dog heavily. He’s done a good job!
Your dog has probably modified his “next to you is the safe spot” superstition and you’re going to make it go away even more with the next stage of training.
Next you’re going to give the dog and leash to your assistant who, hopefully, has been watching. Your assistant is going to be doing the guiding with the leash and pressure on the dog’s hips while you give the command and press the button.
With the dog in a standing position you want to move so that you’re about 20' from him. You’re going to press the button on the transmitter at the same time that you say, “Sit.”
Expect that the dog will try to move away from your assistant and towards you. His new superstition is that as long as he’s next to you, he can stop the stimulation. Your assistant should be prepared to use the leash to stop the dog from moving towards you. This is part of the guidance. It’s identical to what you did earlier when you started the training.
Your assistant should lift up on the leash gently and at the same time apply gentle pressure to the dog’s hips. As soon as the dog’s butt hits the ground, release the button, turning off the stimulation.
Have your assistant give the dog a release command and move the dog forward a few feet. Then repeat this. After a few of these your assistant will notice the same thing that you did, that the dog’s hips “fade away” from the pressure of the gentle guidance. Try about 3-4 more sits with guidance and then on the next time you give the sit command your assistant shouldn’t use any guidance at all.
REMEMBER to release the button as soon as the dog’s butt hits the ground. You’ve just broken one superstition and replaced it with another one. Now the dog understands that If he’s “by a person” and gets a sit command, he has to sit to make the stimulation stop.
You want to get ten perfect sits without your assistant guiding the dog. As before, if sometime during the count the dog needs some guidance, start your count over.
After ten perfect sits, praise your dog warmly. If he’s not stressed, move to the next step. This will depend on several things. How good your timing is and how good your assistant is.
Next you’re going to take the 20' rope and attach one end to the dog’s buckle collar. The other end will be attached to some immovable object. You can use a tree, a post, a streetlight, or anything else you like that the dog can’t uproot.
Attach the rope to the object and lead the dog to the end of the leash. (Here’s a little leash-handling trick that will make the training a bit easier. As you walk to the end of the rope hold it up so that it makes an inverted “V.” Slowly let the dog pull it snug. The idea is not to just let the dog just hit the end of the rope. If you do that and he’s had conventional training, he’ll think he’s getting a correction and you want to avoid that because it may introduce confusion.) You want to walk straight away from the dog. If you drew a line using the rope as a guide, the line would point straight at you.
You’re going to press the button and say, “Sit” at the same time. More than likely your dog will try to approach you. His superstition that he has to be “by a person” makes him want to do that. But he can’t because he’s backtied. Expect to see some confusion on his part. Be ready for what you’ll probably have to do. As soon as you see that he’s confused, continue to hold the button down and approach him. As you do, repeat the word, “Sit” over and over. I’ve found that the ideal rate is a little faster than one command per second. As you approach the dog think of using your body to “push” him into the sit. You’re not actually going to do that, but think of doing it. That will help you assume the body posture that will make it easier for your dog to sit. KEEP HOLDING DOWN THE BUTTON.
If you get to the dog before he sits, and you probably will, use the rope as a leash and your hand on his hips and gently guide him into the sit. As soon as his butt hits the ground, release the button. Praise him lightly verbally and back up to the 20' distance. Stand there for a moment and then give him his release command. Don’t be surprised if he doesn’t move from his sit. If he doesn’t just go to him, praising as you do, so he realizes that he’s doing the right thing and lead him out of the sit. Move him slightly to the side of where he was sitting and then walk straight away form him. Remember the thing about not letting the leash pop him. Again you want him to be at the end of the rope so it’s snug between the post and him and you want to be straight in line with it. If you’re off to one side, when he tries to walk towards you he’ll be pulled to one side. If he does, he could learn to take a few steps to one side before he sits and you don’t want that.
Repeat as before. You’ll probably have to guide him 3-7 times. Don’t forget to hold the button down and keep repeating the command. After a short time he’ll go into a sit as you’re walking towards him. STOP! DON’T APPROACH ANY FURTHER! You’re trying to break the “by a person” superstition. When he does this REMEMBER, release the button as soon as his butt hits the ground. Praise him lightly, not so much that he stands up, and back away to your 20' distance. More than likely, next time you won’t have to approach him quite as close as last time before he sits.
After a few repetitions of this your dog will probably sit without you having to walk in at all. When he does this praise him warmly and stand your ground. Don’t walk in at all. You’ll probably notice that the sit has also become a “stay” without you having to give any new command. I prefer that the dog sit until given a release or another command without being given any further commands.
Wait a few moments and then move him to another location on the same tie out. Continue until you get ten perfect sits in a row. As before, if he misses one, start the count over again.
When you get ten perfect sits in a row, praise him extra warmly. Next move him to a different location and repeat until you get ten perfect sits. Then move to a few more locations until you get ten perfect sits at each one. Be sure to mix up the locations and the surfaces. Have him sit-at-a-distance on grass, on asphalt, on cement, on gravel, on dirt, you get the idea.
As you do these sits, start moving back so you increase the distance from 20' to 30' to 50' to 100' and more. Mix up these distances, moving in and out so the dog gets to sit with you at various distances from him.
Don’t forget the essence of Ecollar training, press the button, gently guide the dog and release the button when he’s done right.
Copyright 2003 Lou Castle
+++++++++++++++++
I'd suggest that you join the Ecollar Plus list on yahoo.
http://groups.yahoo.com/group/Ecollar_Dog_Training_Plus/join
You'll receive a greeting letter that contains several training articles that I've written. They include this post and others.
Lou Castle has been kicked off this board. He is an OLD SCHOOL DOG TRAINER with little to offer. Top
Top
 Top
Top


 Top
Top
 Top
Top
 Previous Topic
 Index
Index Next Topic


